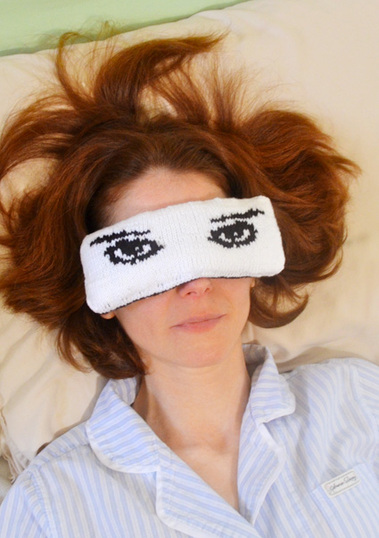
 My Stars and Stares Eye Pillow appeared in this most recent Knitty. I promised a post about fillings and such, so here it is! Eye pillows can be filled with various stuffings. Each has advantages. Rice is inexpensive, odorless, and retains heat well. However, because of its shape, it may poke through the pillow. This isn't a problem with the Stars and Stares pillow, because of the thickness of the case. Flax Seed is flat and won't poke through the pillow like rice might. When microwaved, it produces a mild scent which I find rather pleasant, though not everyone agrees. Lentils are another smooth choice, smaller and lighter than other legumes. Buckwheat hulls are widely used for full-sized pillows. They are very supportive and would be good stuffing for an ergonomic wrist rest to use with your computer keyboard. When settling into position they make a rustling sound similar to the ocean. 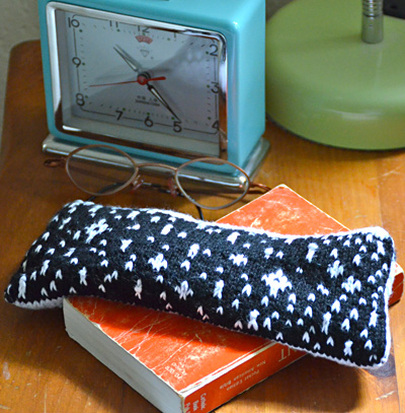 For ideas about scented pillows, Aromatherapy.com is an excellent resource. Visit "Mood Blends" for ideas for combinations that are said to produce certain results. Just be sure to cross-check any essential oils you plan to use if you are pregnant or breastfeeding, or have a condition such as epilepsy or high blood pressure.
I have only used whole herbs and spices and tea blends, not essential oils. I have seen recommendations for anywhere from 3 - 4 to 15 - 20 drops essential oil in a pillow the size of Stars and Stares. If you want to use your pillow in your yarn stash as a sachet, fill it with moth repellents such as lavender, cedar, peppermint, rosemary, cinnamon sticks, and eucalyptus. Silverfish are said to keep away from citrus, bay leaves, sage, lavender oil, cedar shavings, and whole cloves (not ground!). For use in an eye pillow, you may want to grind your herbs and spices or teas. Put small amounts in a resealable paper tea bag or two and insert into your pillow. More pictures in the next post!
3 Comments
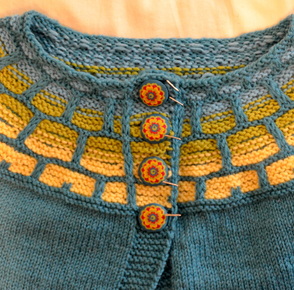 The Garden Windows Cardigan features a patterned yoke which should look symmetrical when buttoned. When blocking it, it doesn't hurt to button it and put a few rust-proof T-pins in to hold it in just the right position. This isn't absolutely necessary, but it's a nice finishing touch. 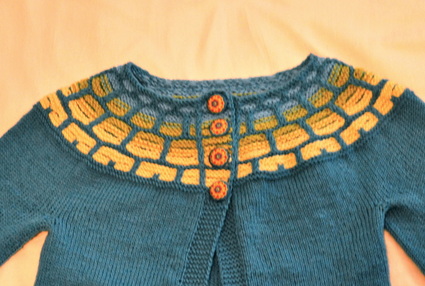 I hate needle-and-thread sewing. So when I knit a project that calls for it, like a cardigan with buttons or a skirt with a zipper, I want to make sure I don't have to do it more than once. The buttons need to stay on; the zipper must stay put. I have some tricks I use to make certain of this. I photographed them while finishing this Garden Windows cardigan. 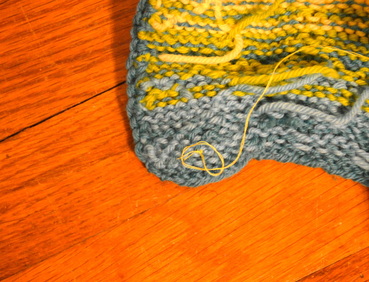 The first step is to make sure the thread stays in the fabric. I have sewn buttons on only to have the original knot I made in the thread pull all the way through at the last minute, leaving the button only precariously attached to the garment. To prevent this, I implement a three step trick. I use the thread doubled and make a large knot at the end. Then I sew through the button once without tugging tightly (the knot does not need to be flush against the fabric). The last step is to take the thread around the original knot, pass the needle through the new loop, and, making sure the knot stays inside the loop, pull firmly, thereby tying another knot around the original knot. 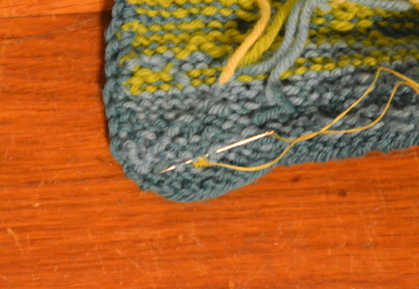 Next, I want to make sure the button is on securely. This involves running the needle through (not under) several knit stitches at each pass. Making sure the needle pierces the yarn helps the button lie flat against the fabric. Taking the thread through several stitches ensures that it will stay put even if one stitch has a weak spot in the yarn.  After sewing the button securely (as many times as the shank or holes will comfortably allow) it's time to fasten off. First, tie multiple knots on top of each other by holding each new loop close to the knit fabric before pulling tight. Then pass the needle through several knit stitches in a circle around that knot, and make another multiple knot on top of the first one. Finally, make one more pass through the knit stitches and cut the thread. Your button will be sewn on quite securely even if you skip a couple of these precautions, but I don't think it takes much extra time---and I prefer to take extra care the first time than have a button fall off just when I want to wear a particular item. I used this method to sew the buttons on a coat I've worn every winter for the past fifteen years (even in the last months of a pregnancy) and they're just as firm as the day I knit them! 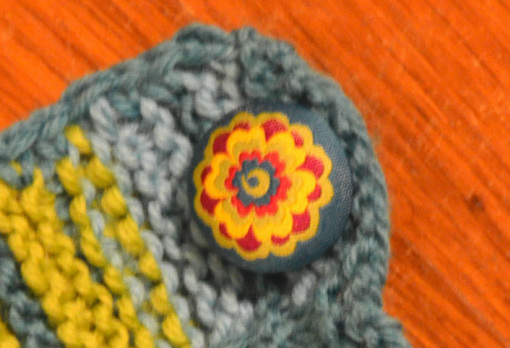 Hot Tip: When using the pen tool in Inkscape, it can be difficult to end your line. Double-clicking should work, but I find my mouse (or maybe my hand) to be finicky in this respect. Simply pressing the return or enter key ends the line and enables you to start a new line anywhere you want!
 Gratuitous Cute Photo Gratuitous Cute Photo I'm not much for holiday knitting. I have too many deadlines as it is. But I know some of you knit gifts for the holidays, and preparations are starting now.
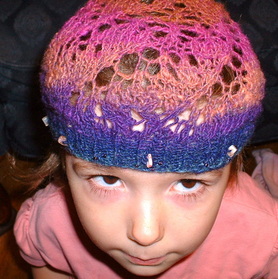
I just finished knitting two sweaters in two weeks (not to mention writing the pattern for them) and I worked out some ways to make the deadline less of a chore and more a sort of inspiration---or at least a fun challenge. 1. Keep moving! I know this may seem like a strange bit of advice to knitters, but even if you're sedentary it helps to switch chairs at regular (or irregular) intervals or to walk around the room with your yarn tucked under your arm. 2. Give yourself goals, and reward yourself when you reach them. Have a piece of chocolate at the end of every set of sleeve decreases, or jog a victory lap around the room when it's finally time to turn the heel (see #1). 3. Figure out how many minutes it takes to get a certain distance in your work, and see if you can improve your time. 4. Read! With the right book, those miles of stockinette will fly right by. 5. Coordinate your lower body with the motions of your hands. Curl your toes, tap your feet, raise your knee. This will slow you down at first, but it's good for you and may even increase your speed. Hang in there! And don't forget to think good thoughts while knitting. My cooking always tastes better when I'm loving my family while preparing it. A similar magic is at work in the fiber arts. But if it's drudgery, maybe it's time to take a break. After all, this is supposed to be fun!  Meandros Hat I have to admit, I was one of those people who assumed that everybody's head is the same size. I mean, I'd actually heard that head size varies very little after the age of 6. So when I used to try a hat on in the store and it didn't fit, I always put it back with a disgusted, "What were they thinking? This won't fit anybody!" It was only later, when I realized how big my head is in comparison to most people's, that I understood.
I suspect what was meant by "varies very little" was "in comparison to height" (or something of the sort). Normal adults can have head circumferences from 21" - 27" (53.5 - 68.5 cm) while normal heights range from around 4'8" - 6'3" (1.4 - 1.9 m). (These figures were culled from multiple websites and were surprisingly difficult to locate. Average height is a much more common statistic.) That means head circumference has a 6" (15cm) variance compared to 19" (~.5 m) for height. That's a much smaller difference, but it's not exactly nothing. Knitting is stretchy, but 6" (or even 3 or 4") is a lot to ask. Those of us with above-average head size know better than to try to knit a 20" (51 cm) hat for ourselves, even taking negative ease into account. (Most hats should have about 2", or 3 cm, negative ease.) I recently read an article that said head size is increasing (albeit incrementally). Adding multiple sizes to a hat pattern doesn't usually require a huge amount of thought or space. (Of course, there are always exceptions. Still, a pattern or book that acknowledges the big-headed minority just may entice us into a purchase. 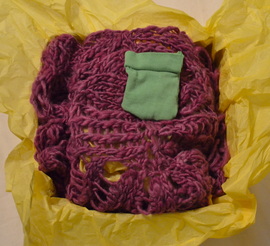 I knit the Palm Leaf Wrap for my daughter's dance teacher and asked my daughter to make a sachet to put in along with it. She loved the idea, and we went to Red Stick Spice to get some good smelling herbs for it.
She chose quite a few (and paid for them herself!) because she wants to make extra to sell at Port Hudson Organic Farm this summer. This sachet is made from an old T-shirt, but she also bought some little squares of fabric to make more. This sachet is filled with her special mix of chamomile (relaxing), peppermint (wards off insects), and cloves (repels silverfish). It smells wonderful. She also bought thyme, lavender, and a tea called ginger twist. I'm going to let her use some dried sage and rosemary from our window box, and fennel and fenugreek seeds that I've had for twenty years. She's also welcome to our allspice seeds, bay leaves, anise stars, vanilla powder, and some rose petal tea which I never quite managed to acquire the taste for. She always has some project going on in addition to her other activities. I really admire that. She's a very industrious kid! This is my unblocked version of Teva Durham's Palm Leaf Wrap. 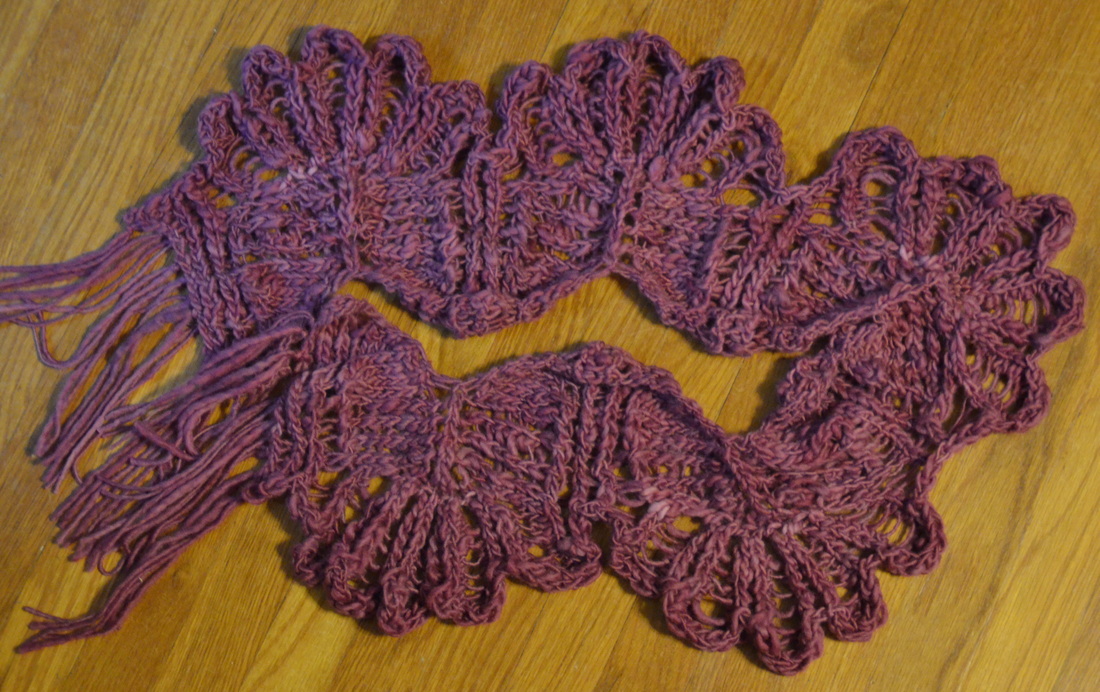
 And here it is pinned out for blocking. Because my son keeps fish, I happen to know the pH of my tap water is extremely basic, so I dissolved a couple tablespoons of acetic acid along with a drop of gentle detergent in cold water to wash the wrap. I regularly do this with red and purple yarns to prevent bleeding because of our water's pH. This tip came from Jill Draper, when I had trouble with a dye that wouldn't stop running when rinsed in plain water. 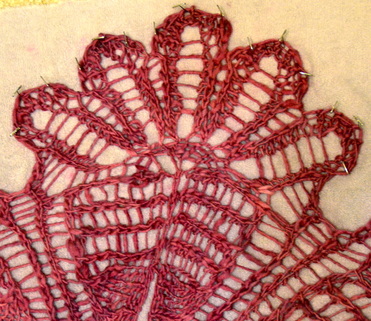 After washing, I laid the wrap out on a couple of towels which were on a carpet remnant on our carpeted floor. I carefully pinned each lobe of the leaf and the two points below each leaf. I can hardly wait for it to dry.
The Manos del Uruguay Wool Clasica that I used is a slightly lighter weight than called for in the pattern. It's a thick-and-thin yarn (just what it sounds like) which I thought would lend rusticity to the design. It's also kettle dyed, resulting in subtle tonal variegation which adds dimension to the color. Plus, I just love the company and its fair trade values. Recently I've been trying to stick to buying fair trade or organic yarn. It's not a sacrifice. 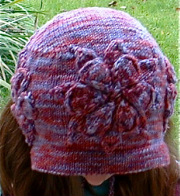 Remember this bonnet? My application of the flowers earned compliments from the designer herself! Turns out I used a special technique without even knowing it, which I only just now discovered on Christine Guest's blog. Her explanation is so clear, I'm passing it on. Enjoy! Hot Tip: After working a bobble or nupp, on the following row, slip the stitch you made the ornament on with the yarn held to the wrong side of the work. Bobbles will stay on the right side and not slip through the work to the wrong side. I recently discovered this trick and am using it now in one of my designs.
|
Hi! I'm Kangath---knit designer, musician, writer, and mother 
Click here to join the Kangath Knits email list
for insider updates and special deals. Subscribe to
Kangath Knits: 
Ruth Roland is a top Baton Rouge, LA music lesson instructor on TryMusicLessons.com! Good ReadsAmy Herzog Designs
canaryknits dull roar Knit and Tonic Linda Marveng needled Ramblings The Sexy Knitter Sheep to Shawl Trappings and Trinkets Two Sides of the Same Stitch Yarn Harlot Archives
February 2018
Categories
All
|
 RSS Feed
