|
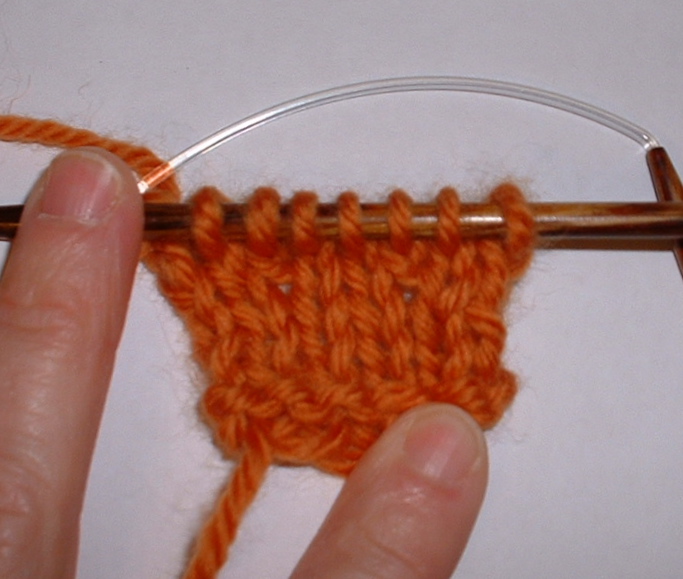
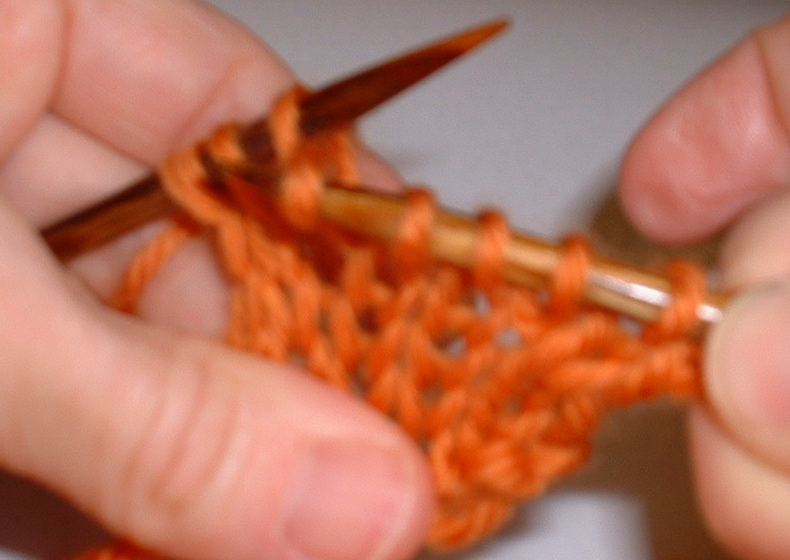
Hot Tip: While most instructions say to pick up and knit stitches with a single needle, I find that in some cases using one needle (in the left hand) to pick the stitch up and another (in the other hand) to knit it is much easier. This works well for picking up stitches in every row, where every other row has a little knotty thing at the end of it instead of a nice looking stitch, especially when knit firmly. It also works well for picking up stitches around a motif, or for dark or fuzzy or slightly felted edges.
0 Comments
I've been a bad girl. 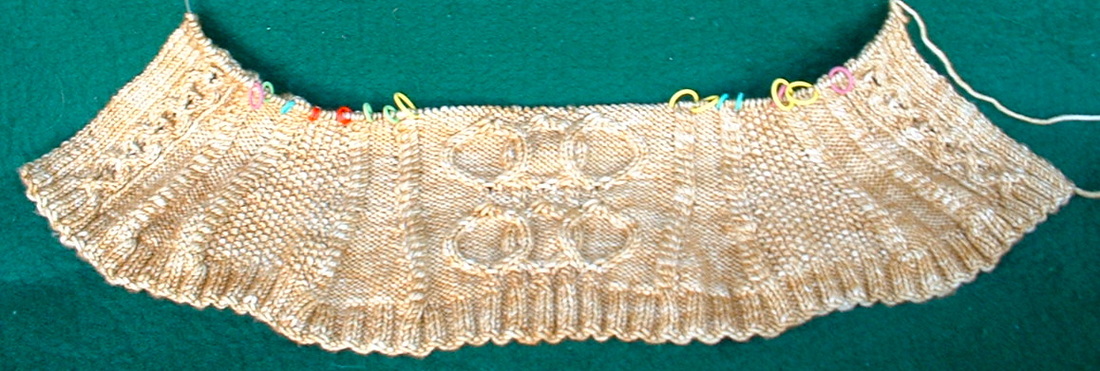 There is knitting I should be working on, and it is not this corset.
But I'm so pleased with how it's going, and excited to get to the bust shaping that I can't seem to put it down. You may be interested in how this pattern graduated from Tabletop Knitting when it involves cables. The answer is two-fold: cabling without a cable needle, and pocket T's (plus a memory for charts---so maybe three-fold). I prefer the pocket T's to hold my dpn's---barely takes any extra time to just slide it into the pocket after working the cable! One drawback is forgetting it's there and going grocery shopping or kissing my husband with a weapon sticking out of my shirt. Or bending down and having it fall out or doing laundry and finding it in the washing machine. But these days I prefer it to cabling without a separate needle. I used to never use a cable needle. I would just knit the stitches in a different order. But that makes some stitch combinations a bit tricky. Meg Swansen advocates switching their positions first and then knitting them, but I hate having stitches off the needle. I don't always use grabby yarn for cables and even when I do I have problems with stitches escaping or splitting. That's why I hesitated to try the method linked in the paragraph above. Loose stitches! But there's a trick to it that makes it feel less risky. I pinch the live stitches so I have a little of them and a little of their mammas between my fingers. Then, careful not to stretch the fabric and pull the stitches out, I open them with the needle and slip them on. I use this technique when I don't want to be caught with a needle in my pocket, or don't really have time to get it out in the first place. Do you use cable needles? All the time, or just some of the time? Do you notice a difference in the way your cables look if you use a needle? Does this difference go away with blocking? My Quadrille is really flying off the needles now . . . when I get the chance to work on it, that is. It has graduated from a Tabletop Project (one that I work on exclusively at home because it requires concentration as well a table to put the charts on) to a Carrying Project (self-explanatory). 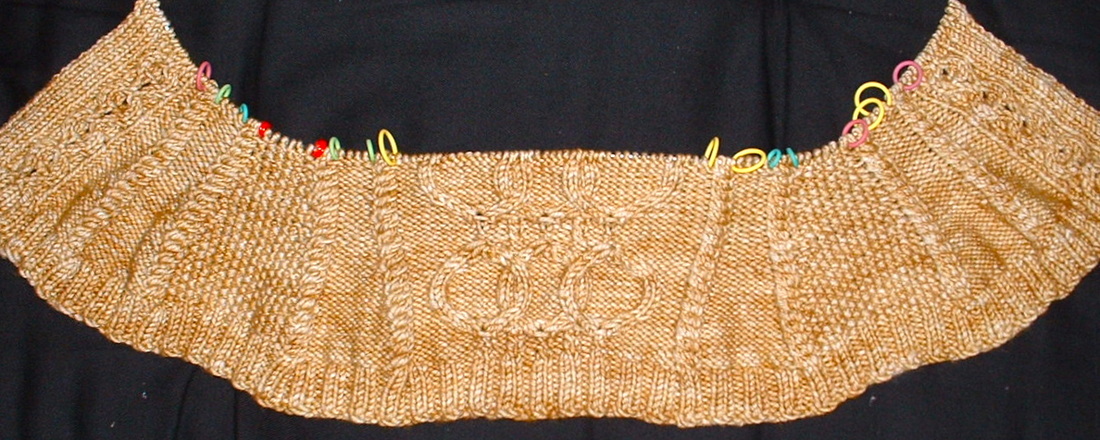 Look at all the pretty stitch markers! I didn't expect to use quite as many as the pattern called for, but I think they're all useful, so I only left off the first and last. Of the markers above, I find the pink and green to be the perfect size. The yellow are too large and floppy and the red and blue are too small.
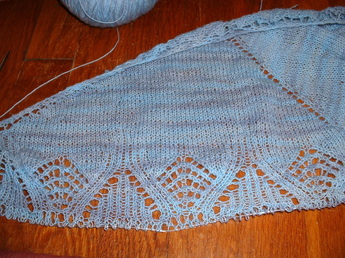
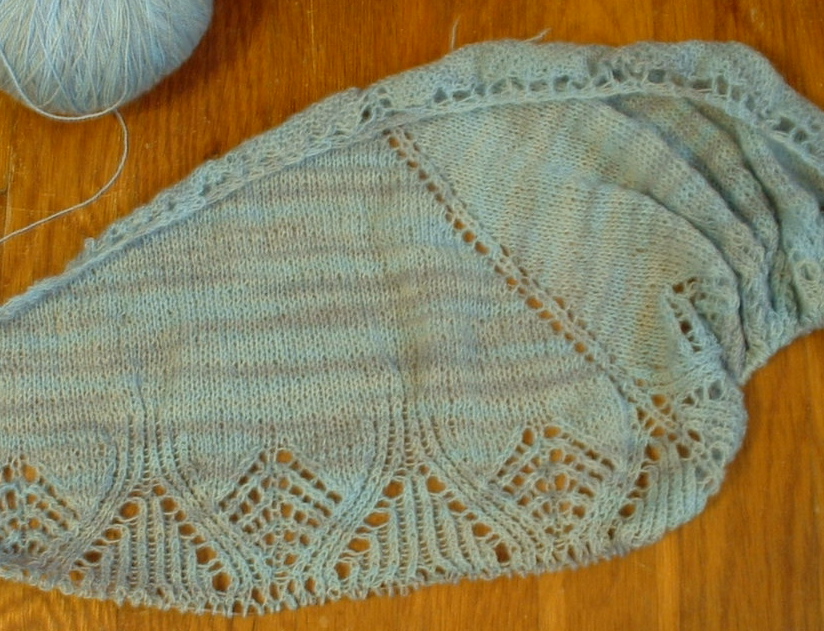
Actually I think the red and blue should be a good size for these size 3 needles. They slip easily on their own. But I don't like slipping them separately---I prefer inserting my working needle into the marker as I'm finishing up the stitch as part of the same motion. It takes next to no extra time. The red and blue markers pop off the needle when I try this with them. Maybe people who dislike markers are using ones that are too small? I prefer rubber markers to loops of yarn. They're not as prone to slip over a different stitch or get knit into the garment. Plus, they make my hands smell like balloons! 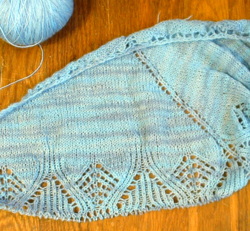 Here's a glimpse of what's on my needles (well, one set of needles) this morning: Anna Dalvi's Fields of Malachite shawl from Ancient Egypt in Lace and Color in Lisa Souza Lace in the Lake Superior colorway. I took this photo with no flash in natural light, but had to use the "enhance" button on iPhoto and then move the temperature setting a little toward the blue. The true color is somewhere between this photo and the one I took using my flash. You can see that image, and the unenhanced flashless photo, below. I've just recently started playing around in iPhoto and HP Photosmart, and it's really interesting how you can make the same photo look much, much better (even Microsoft Word has interesting possibilities).
What are your experiences with programs other than Photoshop? Flash versus no flash? Digital cameras in general? I'd love to hear your thoughts.
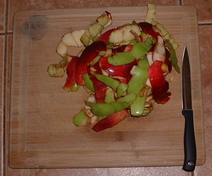 I bet you're wondering what I did with all the apple peels when I made my pie. Or maybe not.
Nevertheless, it's an interesting story. I didn't throw them away or compost them. I saved them. To make syrup! Oh, this is such a yummy recipe. Make it with any amount of peels and try it with pancakes. Apple Peel Syrup apple peels 1/4 cup vinegar 1 cup brown sugar 1 Tablespoon cinnamon 3 cups water 1/4 cup cornstarch 1/4 cup cold water 4 Tablespoons butter Cut the apple peels into small bits and store in vinegar until ready to use. Combine peels, vinegar, sugar, cinnamon, and 3 cups water in a heavy nonreactive saucepan. Cook over medium heat, stirring occasionally, until sugar is dissolved and peels are tender. Mix cornstarch with water and add to syrup. Stir constantly until syrup thickens and turns clear. Remove from heat, add butter, and stir until melted. Hot Tip: When knitting a yarnover through the back loop, I find it easiest to take the working needle under the other needle to pull the yarn through.
 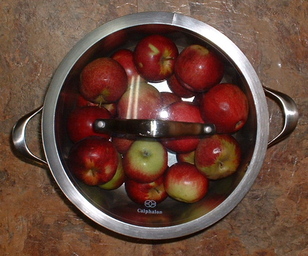 Last week I made applesauce out of the bruised apples. My friend Mary Arlin gave me a super-easy recipe years ago and I've been dying to use it.
It's basically the same recipe as the one I use for tomato sauce. Just put the whole fruit in the pot (cutting off any bad spots first, if there are any, or the tomato ends), put the lid on, and cook. I don't really know how long, but I put it on the stove before lunch and checked it after I ate and the apples had already burst so I figured that was long enough. Afterwards, pluck out any apple cores, put the mush and skins in a food processor and blend. My homemade applesauce was a big hit and hardly any work. Next time I have an excess of tasty apples, I will definitely do it again. 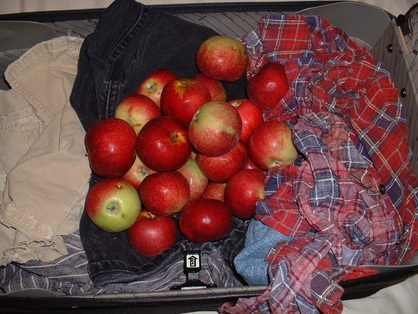 Since we were in upstate New York last week and it's impossible to find decent apples down here we tried packing a few to bring home.
We ended up sending the suitcases through baggage check, which made me nervous, but they traveled just fine. The key is to put a cushion (such as dirty laundry or yarn in zip-loc bags) between the apples and the suitcase and to pack the apples as tightly as possible so as to minimize bruising. If they can't move, they won't bump each other. A few stems might poke holes in their neighbors, but that should be the extent of it. We bought half a bushel of Jonamacs from Littletree and a few more special apples from Black Diamond Farm (several Pixie Crunch, Honeycrisp, and Bramley's Seedling to pack; and two Kidd's Orange apples for eating right then). We sauced about half a peck of bruised Jonamacs, but packed the gourmet apples so well we will be able to eat them all fresh. We can't resist cooking some of them, though---on the menu for next week are apple pie and cinnamon stuffed baked apples. Apples are just about my favorite fruit, and I have missed them terribly. If you've flown apples to other parts of the country, I'd love to hear your experiences. Did we just get lucky? I'd be willing to try again.  I've got some projects in the works, one of which is an eBook I'll be giving away to subscribers to my blog.
This eBook will detail methods of lace design--basically, how to use holes to draw pictures. Various decreases will be covered, along with ways to manipulate yarnovers. I'm not sure when I'll have it ready, but if you really don't want to miss it contact me with your email address and I'll give you a heads up when it's done. Oh, and today is the last day to enter my giveaway. Good luck! In this section of the tutorial, we'll label the schematic using lines and circles. Lines first. Draw lines (using the pen tool) for every flat measurement on your schematic. 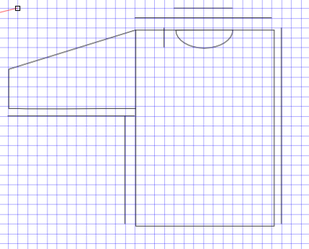
Notice I have measurements for cross-back and collar, and I put the shorter line on top. Next, use the select tool (F1) to select all the measurement lines. Go to Object--Fill and Stroke--Stroke style and choose start and end markers. 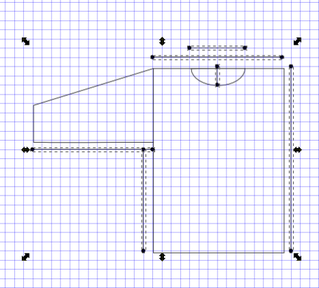
Now for the round measurements. We'll use the circle tool for these. 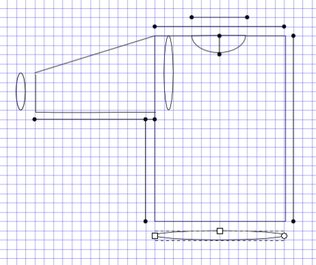
You can leave them like this, or you can make them into arcs. Move the round nodes, then click "Switch to arc" at the top of your window. 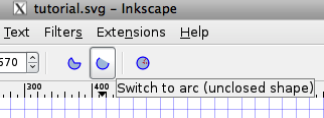
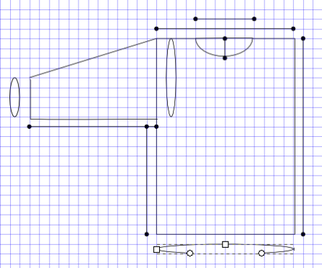
Again, select them all, then add start and end markers. 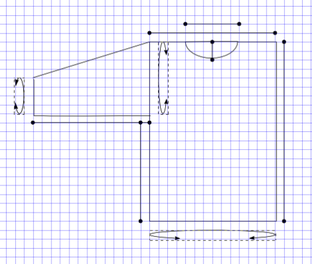
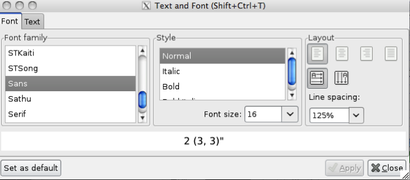
Now add numbers with the Text tool. 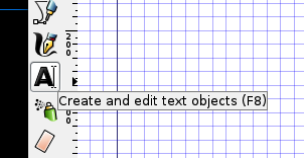
Once you have entered some text, you can fine-tune it using the Text and Font dialog. 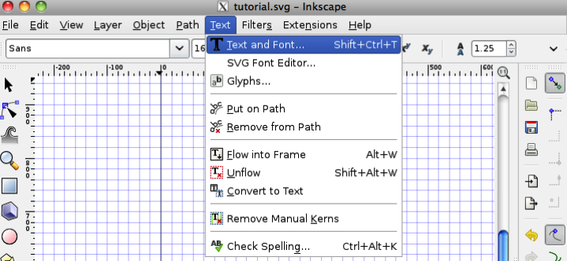
And there you have it. 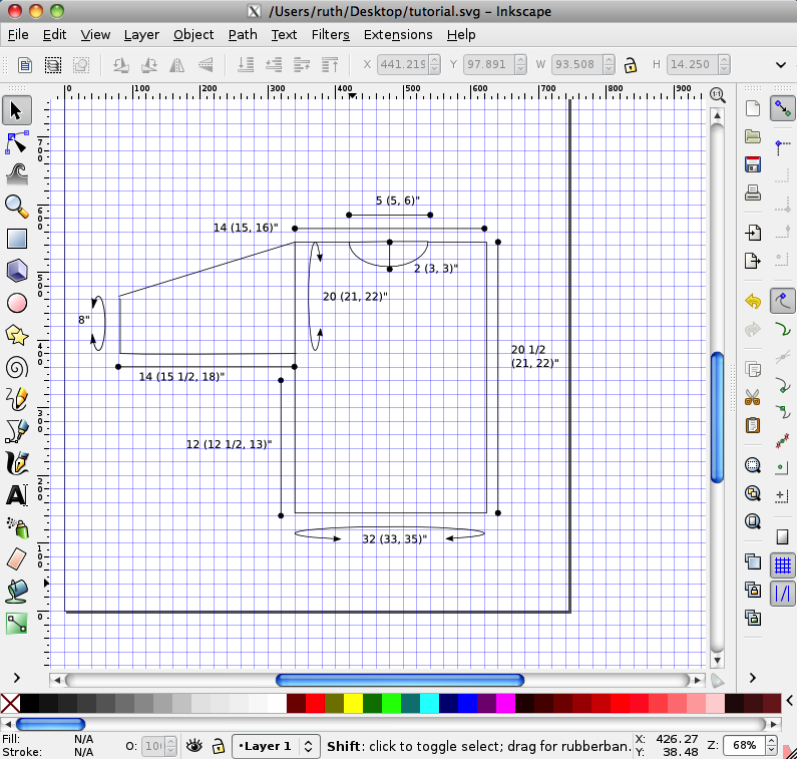
Next up: combining shapes (my favorite!)
|
Hi! I'm Kangath---knit designer, musician, writer, and mother 
Click here to join the Kangath Knits email list
for insider updates and special deals. Subscribe to
Kangath Knits: 
Ruth Roland is a top Baton Rouge, LA music lesson instructor on TryMusicLessons.com! Good ReadsAmy Herzog Designs
canaryknits dull roar Knit and Tonic Linda Marveng needled Ramblings The Sexy Knitter Sheep to Shawl Trappings and Trinkets Two Sides of the Same Stitch Yarn Harlot Archives
February 2018
Categories
All
|
 RSS Feed
