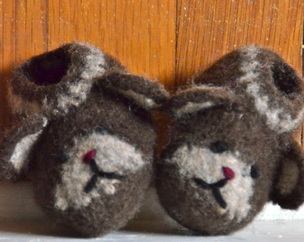
 These are the Teddy Bear Booties I crocheted from Chantal Garceau's instructions. The pattern is not in her book, but it's available as a free download to those who bought the book. I was extremely happy with the finished result, though I wish there were a way to make the backs of the ears a solid color. 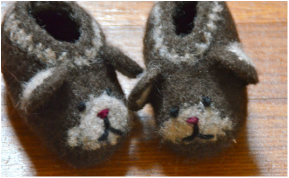 I did not use the templates for the faces, but instead embroidered freehand. The instructions were sufficient to allow me to make two cute, individual faces.
I also love the little contrasting color touch along the upper edge. These were a gift for a friend's new baby, and I like to think the little tyke will be able to play with them after he outgrows them. Adorable!
0 Comments
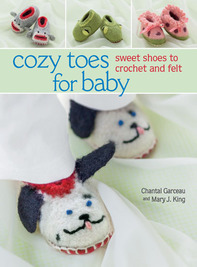 Cozy Toes for Baby by Chantal Garceau and Mary J. King, photography by Brent Kane, pub. Martingale, 2014. This book features 7 patterns for the most darling felted baby booties imaginable, plus a basic pattern without decoration. The shoes are crocheted, felted, and fitted with leather soles. They come in 5 sizes, from newborn (4") to 24 months (5 3/4"). Proceeds from the sale of this book benefit the Imani Project, aiding Kenyan children orphaned by HIV/AIDS. Chantal also has a business, Chantal's Little Shoes. The company sells shoes from the book in addition to other shoes (my favorite is the Berry Delicious which looks like a strawberry with a little blossom on top) and custom-designed shoes for businesses. 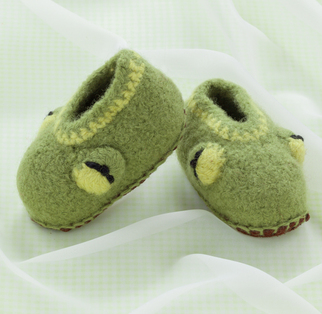 First, Chantal provides a little introduction explaining the genesis of the book and a call to all crafters and artists to make an impact on the world. Then she rolls up her sleeves and plunges into the materials needed to make the shoes. She covers yarn, trim, and satin ribbon, but my favorite tips come from the section on leather. All the shoes feature leather soles. I made a pair for a newborn and simply left the soles off. There are stickers and paint you can use to make the slippers grip the floor without leather. But leather (and as a vegetarian I hate to admit this) is really the best option for little foot bottoms. Chantal recommends recycling leather, whether from one of your own garments or handbags or from a thrift store find. She even gives hints as to where to look in the thrift store and other ways to find just enough sole for one pair. 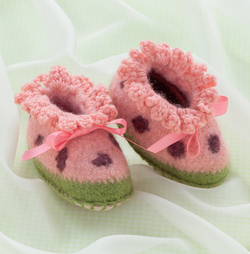 "Tools and Supplies" is just what it sounds like, but contains references to other parts of the book as well as lists of necessities. Then comes the Basic Shoe Pattern. It's lovely that this section starts with the Gauge Swatch. Details are provided for crocheting and measuring, and adjusting hook size if the swatch doesn't measure up. Throughout the Basic Shoe Pattern there are sidebars with hints for how to work the beginnings of rows and how to tell which side is the right side. These valuable tips are sprinkled throughout the book with more advanced techniques. There's even a chart in color showing the shape of each shoe before felting. Photos of each step give crafters a sense of security. 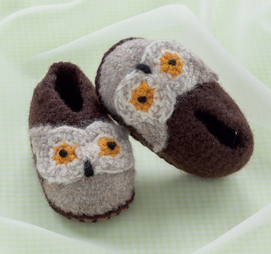 The sections at the end of the book, "Felting" and "Soles" are just as well thought out and generously supported by photos. The photography is capable, but without real babies it's hard to know how the shoes would fit. A photo of an actual baby modeling the Silly Monkey Shoes is on page 45. I wasn't confident that the newborn I was shoeing would have equally fat ankles, so I added a cuff in machine-washable sock yarn. 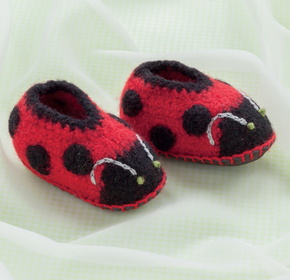 The patterns are well written. There is, however, no assistance in what to do with the main color when working the contrasting color faces (such as in Ollie Owl and the Ladybugs). Are we expected to use separate yarn bundles? Cut the yarn in between? Strand across the back? In a book where everything else is made clear, that really stands out. Each shoe has a special touch that makes it different from the others---seeds and a precious cuff on Fresh Watermelon, clever yet simple eyeballs on Froggy, and Ollie Owl's virtuosic face mask. Chantal even includes a gift card to print or photocopy which details wearing and washing instructions. But the best part, to me, is the fact that the proceeds are donated to the Imani Project. What a worthwhile way to use enterprise and creativity! These projects are wonderful for the budding crocheter because felting hides uneven stitches. Chantal also offers individual kits in her shop---and none of the kit patterns are duplicated in the book. Please support her work! Disclosure: The publisher sent Kangath a review copy of this book. Kangath was not otherwise compensated for the preceding review. All opinions expressed in the review are her own. 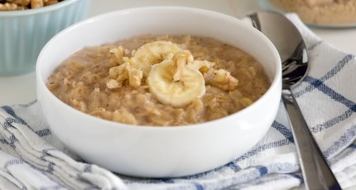 I'm a big oatmeal fan. I loved the oatmeal my mother used to make for us in the mornings, warm, with sliced bananas and brown sugar. When I went to college, I made huge batches of oatmeal and filled bowl after bowl, putting fruit in some servings, mixing other with granola or nuts. When I married, though, I discovered my husband only liked instant oatmeal. Flavored. In packets. I didn't want to spend so much money on individual servings when we could make it in bulk, so I developed a recipe for apple cinnamon instant oatmeal (and by the way, a great source for gluten-free instant oatmeal is LibreNaturals): Apple Cinnamon Instant Oatmeal 10 cups quick oats 1 - 5 cups powdered milk, depending on the brand 1/3 cup cinnamon 1/2 cup sugar 6 ounces diced dried apples makes about 12 cups With the larger amount of milk, add equal parts of oatmeal mix and hot water. The smaller amount of milk uses about 3/4 mix to 1 cup water.  Now, nearly twenty years later, my family is tired of apple cinnamon. I should mention that in the meantime I have converted my husband (though not the whole family) into a "hot cereal lover." (He doesn't love every kind, but then, neither do I.) In particular, the whole family enjoys a bowl of steel-cut oats with maple cream (which may be an entirely different post in the future). But the instant oatmeal is still a nice, easy, spur-of-the-moment way to have a hot breakfast. Down here in Louisiana, maple syrup is prohibitively expensive. So I've been making maple brown sugar with maple extract, and I thought I'd share my proportions with you: Maple Brown Sugar 1 cup brown sugar 1/2 teaspoon real maple extract Stir the extract into the brown sugar. Taste. Add more sugar if maple flavor is too strong, more extract if not strong enough. 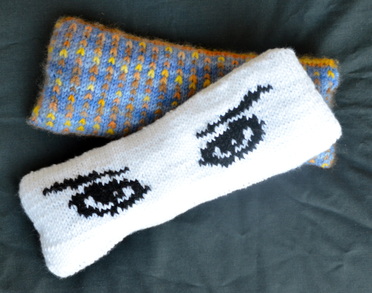 A couple months ago I received an email telling me my Stars and Stares Eye Pillow pattern had been accepted to Knitty. I was thrilled! I love these eye pillows and they were fun to knit. The eyes on black and white one look like women's eyes, while those on the other pillow have a slightly anime feel to them. I don't know which I like more: the muted look of the variegated hand painted yarn, or the stark contrast of the black and white. Each has its own appeal. 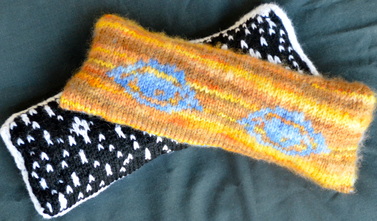 One thing I like about Knitty's process is that they allow you to look over the final tech-edited version before publication. This was especially good in my case because my pattern contains several charts.
Knitty has a chart editing program they use. They don't require designers to submit charts created with that program, but every accepted chart has to be entered in that program by hand. Stitch by stitch. Most of my charts were relatively large with no repeating patterns. Tech editor Kate Atherley did heroic work on them, but there were a few mistakes the first time around. I was happy to have the chance to check them before they went live. They are now error-free! Stars and Stares uses some interesting techniques: Judy's Magic Cast On, Grafting, Catching Strands, and Weaving in Ends from the Right Side. An eye pillow is a small project and reasonably quick knit. Why don't you give it a try?  One knitter asked me why I chose to use such a firm gauge for my Stars and Stares Eye Pillow instead of knitting just a pillow cover. The truth is, I initially conceived it as a pillow cover but soon realized that it could be the entire pillow. Neither of mine has leaked a single rice grain, and I use them all the time. The firm gauge did not hurt my hands, but then my hands are used to that kind of thing.
While I was developing the pattern I discovered that the foot of a large adult sock, such as a man's tube sock, is the right size for an eye pillow. If I had sewn a pillow to go inside Stars and Stares, I would have cut the foot off one of my husband's old socks, filled it, and sewn up the cut side (after darning any holes in the foot!). Maybe I'll knit a third eye pillow using this method. I might even put a strap on it for my husband to use. He finds my pillows soothing, but he doesn't like having to balance them on his face! 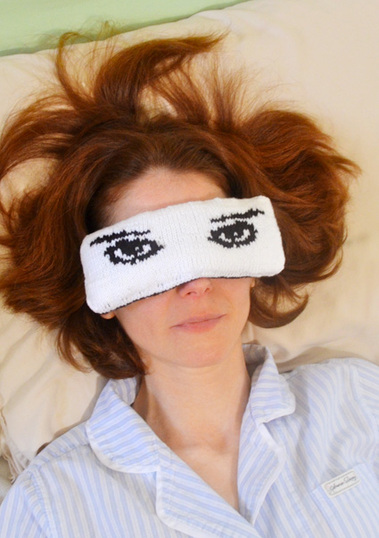 My Stars and Stares Eye Pillow appeared in this most recent Knitty. I promised a post about fillings and such, so here it is! Eye pillows can be filled with various stuffings. Each has advantages. Rice is inexpensive, odorless, and retains heat well. However, because of its shape, it may poke through the pillow. This isn't a problem with the Stars and Stares pillow, because of the thickness of the case. Flax Seed is flat and won't poke through the pillow like rice might. When microwaved, it produces a mild scent which I find rather pleasant, though not everyone agrees. Lentils are another smooth choice, smaller and lighter than other legumes. Buckwheat hulls are widely used for full-sized pillows. They are very supportive and would be good stuffing for an ergonomic wrist rest to use with your computer keyboard. When settling into position they make a rustling sound similar to the ocean. 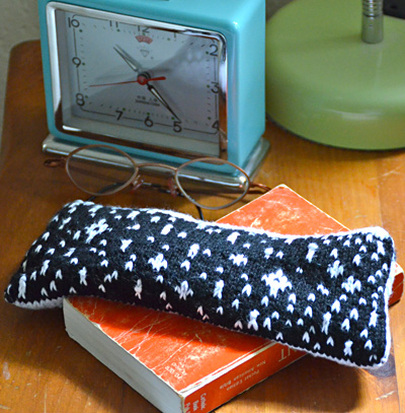 For ideas about scented pillows, Aromatherapy.com is an excellent resource. Visit "Mood Blends" for ideas for combinations that are said to produce certain results. Just be sure to cross-check any essential oils you plan to use if you are pregnant or breastfeeding, or have a condition such as epilepsy or high blood pressure.
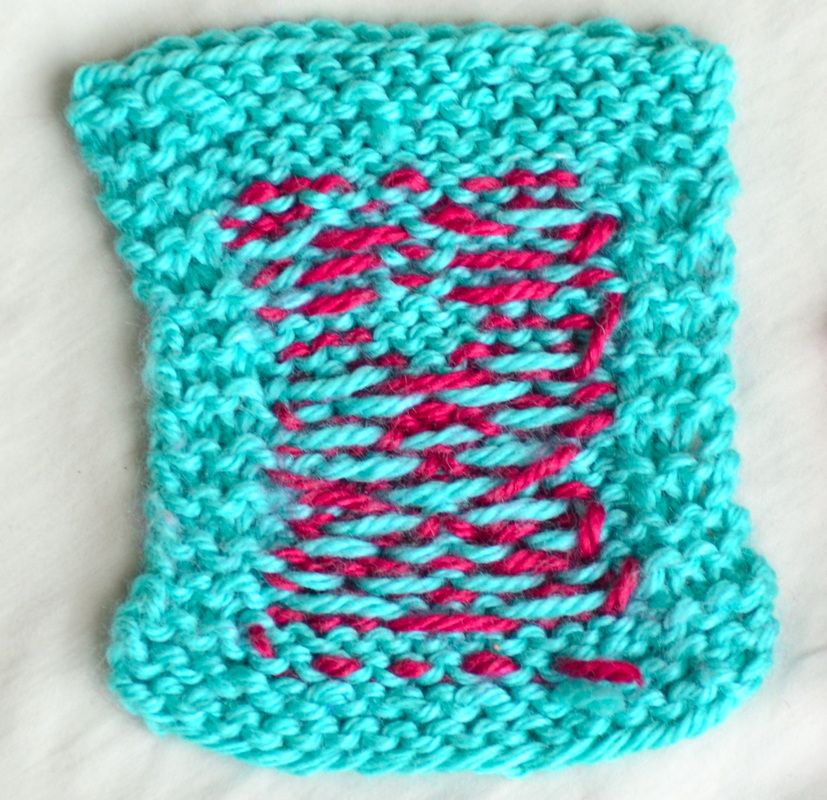
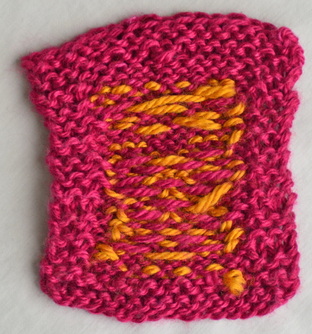
I have only used whole herbs and spices and tea blends, not essential oils. I have seen recommendations for anywhere from 3 - 4 to 15 - 20 drops essential oil in a pillow the size of Stars and Stares. If you want to use your pillow in your yarn stash as a sachet, fill it with moth repellents such as lavender, cedar, peppermint, rosemary, cinnamon sticks, and eucalyptus. Silverfish are said to keep away from citrus, bay leaves, sage, lavender oil, cedar shavings, and whole cloves (not ground!). For use in an eye pillow, you may want to grind your herbs and spices or teas. Put small amounts in a resealable paper tea bag or two and insert into your pillow. More pictures in the next post! Being both a knitter and a violinist, I need to take good care of my hands. I'd like to share five really great hand stretches with you, and a bonus forearm stretch. I use these all the time. They're excellent warm-ups before knitting or fiddling, but they're also good for when I find myself waiting around with nothing else to occupy my hands. 1. Hand Massage: With your left thumb, massage your right palm. Massage the back of your right hand with your left fingers. Do this for one minute, then switch hands and repeat. 2. Clench and Fan: Clench your hand into a tight fist and hold for five seconds. Release smoothly, extending your thumb and fingers into a fully stretched position and hold for five seconds. Repeat five times for each hand. 3. Thumb Stretch: With your left hand, gently pull your right thumb away from the hand and down toward the forearm. Hold for five seconds. You should feel the stretch in the base of your thumb, palm side. Repeat for your left thumb. Five repetitions, alternate thumbs. 4. Wrist Stretch: Hold the right hand in front of the body, palm facing out, fingertips up, fingers together. With the left hand, grasp the right hand's outstretched fingers and gently pull the fingers back toward the body. Hold for five seconds. You should feel the stretch in the wrist area. Repeat for the left wrist. Five repetitions, alternative wrists. 5. Wrist Circles: Hold both arms in front of your body with your elbows held at a comfortable angle. Gently move your hands in circles, rotating your wrists. Circle both hands toward your body and then away, or circle both hands clockwise and then counter-clockwise. Do five repetitions in each direction. 6. Forearm Stretch: This isn't really a hand stretch, but it's an important one for both knitters and musicians. Put your hands together, palms flat against each other, elbows bent, fingers pointing downward. Press up until you feel a good stretch in the inside of your forearm. Hold for five seconds. Move your hands so the fingers point upward, and press down until you feel the stretch. Hold for five seconds. Do five repetitions of this complete exercise (pressing up and then down). In my last post I demonstrated how to catch floats in stranded colorwork. Here are the Right Sides of the swatches: 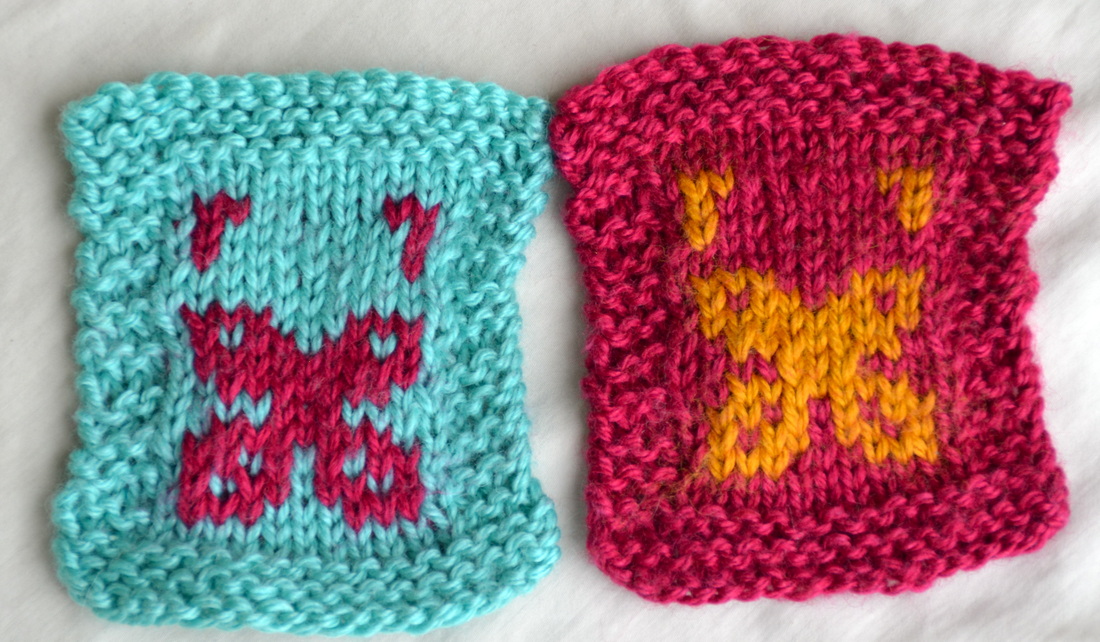 And these are the Wrong Sides. It's easiest to see the strand catching at the tops of the swatches. The little Contrasting Color bumps across the tops of the backs don't have corresponding stitches on the front. That's where I caught the floats to reduce their length.
I love stranded colorwork, and I hope you will, too!
|
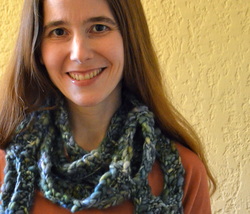
Hi! I'm Kangath---knit designer, musician, writer, and mother 
Click here to join the Kangath Knits email list
for insider updates and special deals. Subscribe to
Kangath Knits: 
Ruth Roland is a top Baton Rouge, LA music lesson instructor on TryMusicLessons.com! Good ReadsAmy Herzog Designs
canaryknits dull roar Knit and Tonic Linda Marveng needled Ramblings The Sexy Knitter Sheep to Shawl Trappings and Trinkets Two Sides of the Same Stitch Yarn Harlot Archives
February 2018
Categories
All
|
 RSS Feed
